The first Bond story? Chitty Chitty Bang Bang

| February 17, 2013

You read that right. Chitty Chitty Bang Bang.

Here’s why Chitty Chitty Bang Bang (hereafter CCBB) is the first Bond film.

1. Ian Fleming, author of the James Bond books, wrote the book “Chitty-Chitty-Bang-Bang: The Magical Car” published in 1964.

2. The film CCBB was produced by Albert R. Broccoli, one of the producers of all the Bond films.

3. As in most Bond films, in CCBB the first love interest of the main character dies. Caractacus Pott’s wife dies previous to this story.

4. In Bond films the woman of the hour has a suggestive name. In CCBB Caractacus Pott’s female counterpart is Truly Scrumptious.

5. James Bond and Caractacus Pott both held the rank of Commander in the Royal Navy.

6. Bond movies often feature a car with gadgets and special features. CCBB: the car has a few tricks.

7. Bond films usually have a megalomaniac villain. In CCBB we have Baron Bomburst played by actor Gert Fröbe who previously appeared in the Bond movie Goldfinger as the titular villain Auric Goldfinger.

8. In Bond movies the above mentioned villain usually has an awesome lair with huge interior space.  In CCBB we have Baron Bomburst’s castle set in the closest thing in existence to a Disney Princess castle – Neuschwanstein Castle.

having got this bit of movie trivia off my chest I leave you with the main song of the movie (Bond movies always have catchy title songs!)


Mechanical counter made on the ShopBot Part 1

| December 23, 2012

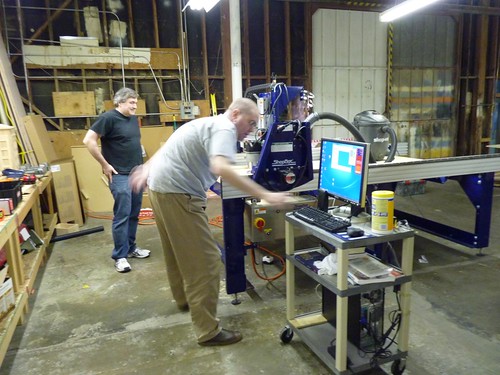
Owen adjusting the ShopBot

We’re loving our new ShopBot, a robotic wood cutting/carving machine. I’ve been looking for projects that highlight the machine’s capabilities.

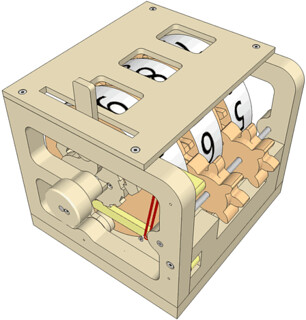
Matthias Wandel's counter This Wooden counter was designed and made by Matthias Wandel.

Fascinating and exactly what I was looking for. Matthias has examined traditional mechanical counters and explains their workings while designing one in wood. His full write-up shows examples of each aspect of the mechanism.

Matthias makes all his wood gears using a bandsaw. However, he designs his gears using a program he wrote and comments on the ShopBot forums confirmed that the output of this software works in the PartWorks program.

Confused yet? So was I. It was time to start working this process methodically.

First I bought Matthias’s plans. At $12 I feel these are an excellent value and I strongly recommend that others purchase these plans if you are interested in this project.

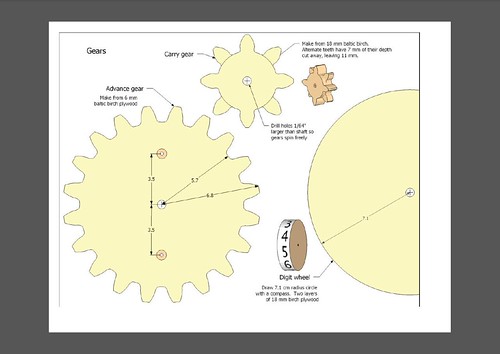
I found one page that had two gears I thought would make a good start on the learning curve.

First gears

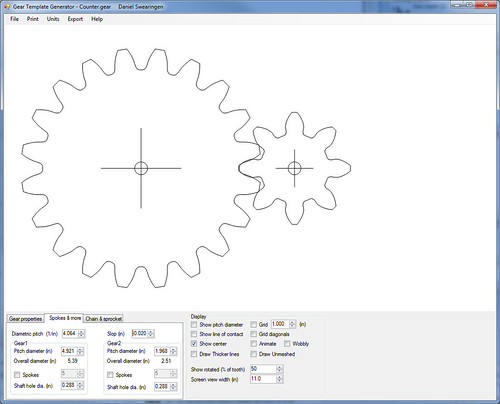
First I wanted to make the 20-tooth large gear and the 8-tooth smaller gear. I bought Matthias’s Gear Template Generator program for $26. After a bit of experimenting with the various parameters I had a set of gears that were the same size and shape as the those in the counter plans.

Gear template generator

Next I exported these gears in DXF format which can be imported into PartWorks.

PartWorks is a program supplied with the ShopBot and it has two functions: manipulation of drawings, and conversion of drawings into cutting instructions that can be read and executed by the ShopBot.

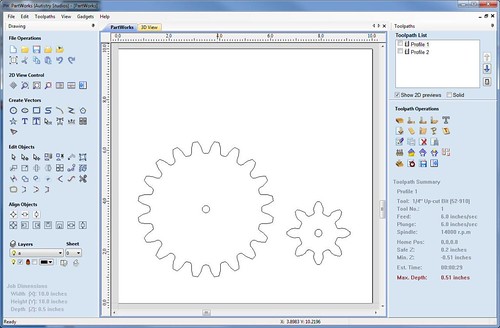
Importing the gear drawings was seamless and some checking confirmed that a standard 1/4-inch cutting bit would be able to cut the gears with almost no loss in curve detail.

PartWorks gear imported from template generator

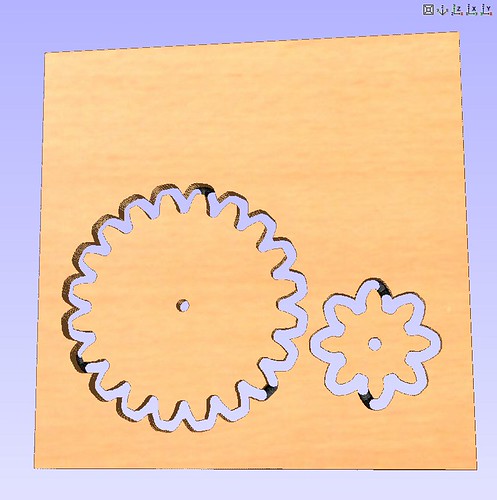
Next I generated a cutting path and used PartWorks preview cutting feature to confirm it was doing what I intended.

PartWorks cut preview

Time to cut!

I did one “air cut” where you have the machine move through the cut but in the air above the wood. This allows you to confirm that the movements look as you expect and stay within the range you expect.

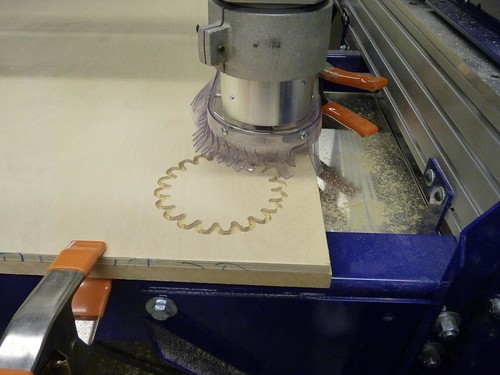
I set up some 1/2-inch birch plywood (note that I used four spring clamps, you can only see two in the pictures), calibrated the ShopBot and started the cut.

Cutting gears in plywood on the ShopBot

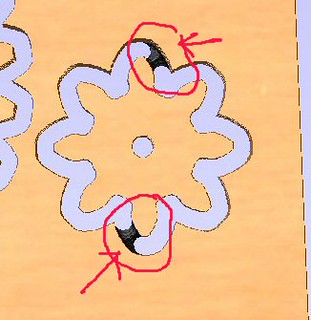
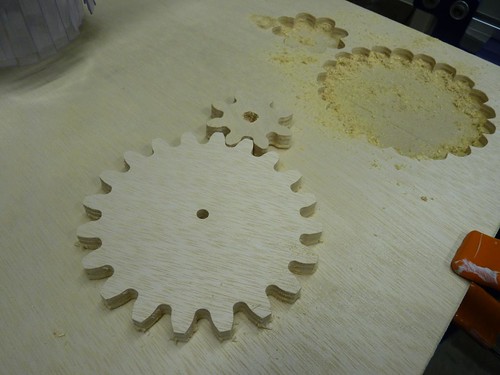
Oops One mistake was that I only used two small remainder-tabs on the smaller gear. it needed more so when the ShopBot moved to cut the center hole the small gear broke loose and rattled on the bit making a large rough center hole.

Little errors like this are why you test!


Fresh from the ShopBot

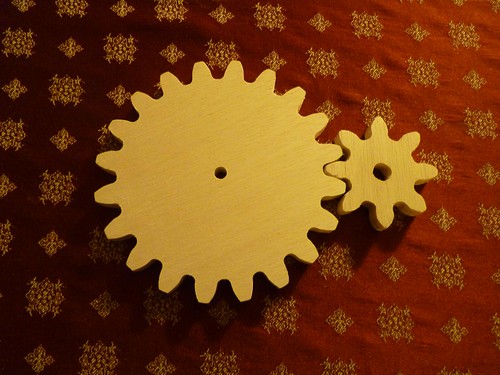
Other than the enlarged center hole, the gears look and work great. After a little sanding, I have my first two gears.

Sanded gears

Over the next few weeks I’ll convert Matthias’s counter plans into a format usable by the ShopBot and proceed to make the parts.

Court Does Dollzzz

| December 18, 2012

When I was a little girl my grandmother took up doll making as a hobby after she retired. She made porcelain dolls with hand painted faces with glass eyes; hand stitched all the clothing, and bought beautiful wigs for each of her creations. Mostly she made baby dolls and gave them to her granddaughters, but she also made Native American maidens and fairytale princesses. I always wanted to make dolls with her, and tried. However, the time and skill required to make porcelain eluded me as a child, as I was impatient. Now being at adult I have rediscovered this interest in the modification of the popular line of dolls by Mattel, Monster High. This was not, however, my first choice in doll-type.

001 What I really want to work on are Dollfie ball jointed dolls from Japan. These are incredibly intricate cast resin dolls with realistic points of articulation and an eerie ethereal quality that I have admired on the internet for ages. It turns out these dolls are majorly expensive. As in more than ½ my mortgage payment expensive! So I tried to find an alternative, and discovered an entire group of people were modifying these Monster High Dolls in lieu of Japanese Ball-Joint Dolls (JBD) because they too were artists on a budget!

Monster High characters are the theoretical children of classic movie monsters like, Frankenstein, Dracula, Medusa and the like. The proportions are funky and a little creepy but very suited to creature-like humanoids. They have pre-made characters like Draculaura, and Howleen Wolf, these dolls feature pre-made back stories, make-ups, clothes and rooted hair. The line also feature “Make your own” sets with no pre-determinate features beyond plastic color and minor feature differences.

Four weeks ago I purchased my very own set of “Make your Own” dolls and got to work on a goldfish inspired sea-monster doll. First I found tutorials online and proceeded to stand on their shoulders to help me create my new dolls features. Thus far I have stripped her of her original face paint, painted her skin a new color and created a wig.

First I removed her current facial features and prepped her body with a rubdown of acetone to remove previous paint and “mold release” from the doll parts. Then I prepared with Mr. Hobby brand, Mr. Surfacer, primer. This turned out to be quite a journey to acquire, as every doll modification blog post and enthusiast insists that Mr. Hobby Products are the best materials to use in doll modification. Unfortunately, these products are from Japan, and are really difficult to get with any regularity. (Thank you Big Robot Hobby in Berkeley, and The Hobby Store in Japantown for existing!) After I primed the surface I painted with white hobby paint as a base and added layers of orange. This is where I have paused on the body and face for the time being, because the hair has been a journey.

After much research and reading of countless blogs I found a tutorial on making wigs for BJDs and Monster High dolls from, Updog1986, on YouTube . After making the wig cap, a time consuming project in itself, I made lots and lots of hair wefts from fake Kankelon hair bought from a wig shop, and foam tack glue. After the wefts dried on my “scrap wood weft making board”(I made this with a scrap board wrapped several times in cling wrap. Then I cut them into smaller workable tracks and began gluing them around the wig cap I made.

Great stop action movie idea

| January 4, 2011

Great project idea. Minecraft Lego and other Lego.

Painting the Hasbro AT-AT

| August 16, 2010

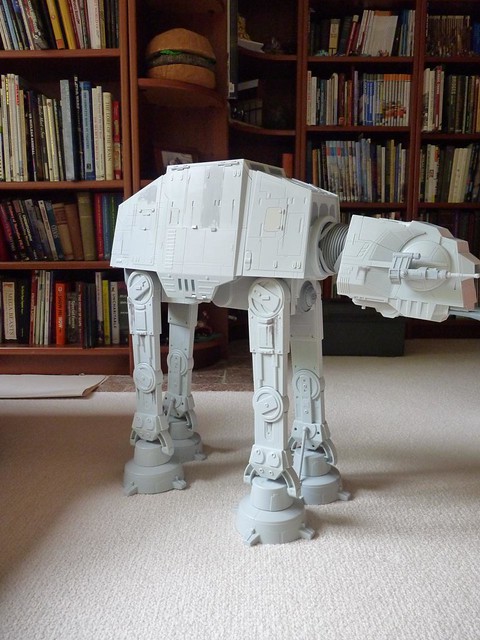
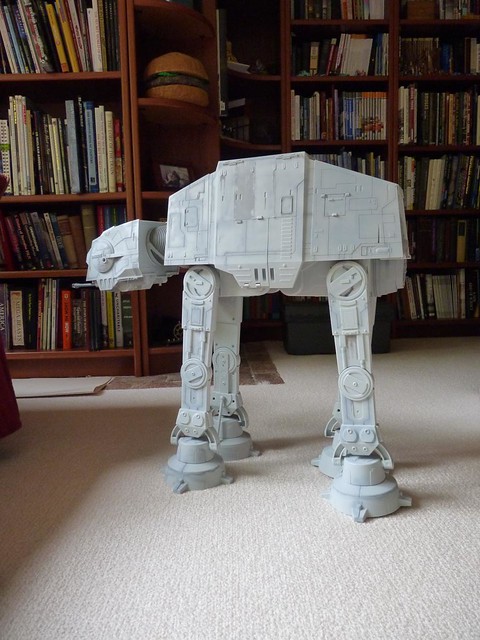
Our new coffee table (a.k.a. the Hasbro STAR WARS AT-AT) was looking a bit too “plastic” so I used it as an excuse to re-climb the learning curve on my Aztek airbrush.

Here is the unfinished side as a “before”

AT-AT repaint before

I free-hand airbrushed the panel lines with a medium-dark gray (Tamiya XF-53 neutral grey) with spray lines maybe 1/8 to 1/4 inches wide. Next I made a mix of “Star Wars white” out of 4 parts Tamiya XF-2 and one part Tamiya XF-66 light grey and painted the panels themselves. Doing the one side took about an hour and I needed a break after that but here is how it looks so far.

AT-AT repaint after

The difference is subtle but the flatter finish and more varied coloring makes the detail pop nicely.

Project idea: micro model railroads

| August 10, 2010

Micro Layouts are small model railroads and are a sub-genre of model railroading that lends itself well to small bite-size projects. Small Layout Scrapbook has been around for many years and is a great source for these layouts.

They present great opportunities to make dramatic scenes. This is a small mining layout that can be found at the Small Layout Scrapbook called Draversaz built in 1:48 “O” scale and is only 24 x 18 inches in size.

Picture 005 One of our students, built this micro layout for his project a couple years ago. We ended up making it 11 x 41 inches in size and it is HO scale with a small trestle and a tunnel. More about this project can be found here.

Project idea: animating ordinary objects

| July 14, 2010

This is a really cool movie made by Patrick Boivin and this kind of movie would be an excellent project for one of our students.

Here’s the Making-Of reel showing some of the techniques used.

Note that the studio has acquired the Hasbro’s latest release of the “Star Wars 3.75″ Super Deluxe Vehicle: AT-AT.” Just one big hunk of plastic awesomeness.

Project ideas: Robots and Robot sculpture

| March 29, 2010

I have an RSS news feed from Dark Roasted Blend going and they often have great project inspirations.

This morning’s was Utterly Irresistible Robot Sculptures –pictures of really amazing robot sculptures.

Project idea: CycleKarts!

| January 1, 2010

A CycleKart is a small four wheeled car made to look like one of the classic racing sports cars of the 1920’s or 1930’s.

cycleKar3

Power is specified as a 200 cc Honda one-cylider engine. Wheels are based on 17″ x 2″ motorcycle rims. Total car weight must be under 250 lbs.

I love the look and these would be great building projects. If we built some using 50 cc engines they would fall into the strange regulation world of “mopeds” and perhaps be made some sort of street legal.

Resources:

A more perfect world (or globe)

| November 16, 2009

Lots of trial and error learning goes on in our workshops. Sometimes the emphasis is on “error.”

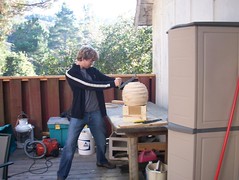
One of our students from an early workshop, Reggie, wanted to make a globe. We said “sure.” Our strategy was to build it out of layers of pine — and that was REALLY hard.

The Globe

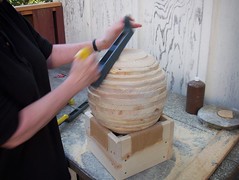
We all took turns rasping and sanding that #$%@ thing:

Janet in motion Reggie Rasps the Globe

Perfect Form or Zen Rasping The World is Getting Rounder

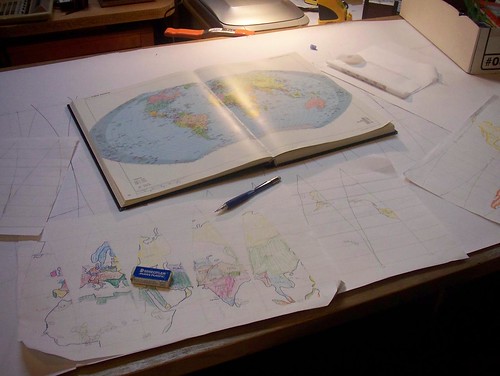
We made a “skin” for it using gords painstakingly laid out with huge rulers and large homemade compasses and Reggie drew his ideas of an old-fashioned map onto them.

Reggie's maps

In the end we had an OK first effort definitely falling into the “Done Is Good” category.

Picture

If we were going to do it again I’d unhesitatingly buy a big wood lathe and simply turn the big ball on a lathe.

Or, I’d take other’s beautiful work as a good example:

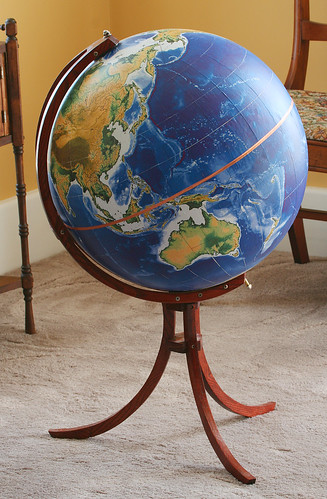
Today I saw this great project at the MAKE blog

Image by davesbit from Flickr

Image by davesbit from Flickr

From MAKE: Flickr member davesbit built a globe by making a mold from a beach ball, and designed a map for it using The Generic Mapping Tools.

The globe is about 20 inches in diameter, made from fiberglass and filled with foam. The map parts are built with the Generic Mapping Tools and glued on…

Making-of photos on the Flickr photo page.