Improved print of profile of excellence video

| December 31, 2012

Janet Lawson and Dan Swearingen, the founders Autistry Studios were chosen as one of ABC7′s 2012 Profiles in Excellence. This is an improved video print from a DVD supplied by ABC7.

2013 – great things to come!

| December 26, 2012

2012 was an amazing year and 2013 is shaping up to be spectacular! The Autistry Core Workshops have grown in number, in size, and in the diversity of projects. We have all learned so much by working together to make cool ideas become real. Here are just a few of the wonderful Autistry student projects:

Daniel sands his guitarMaya's doll022Boxes coversApril's Tamiya 1:35 M4 75mm 021Ryan's green sunburstBarugorusNathaniel's TroomsSara, Marina, and Erin  painting the TardisRinny's quiltDanielwithGuitar

Lauren ShopBottingWe have great plans for 2013! The ShopBot is now running well and most of the students have been trained on the basics. We will be launching Autistry Enterprises and our first endeavor is to create a production pipeline – from concept to customer. Starting with a student-built prototype for a project kit we will develop the cut files needed by the ShopBot, cut out the pieces, package them up, and take them to market!

ShopBot magazine rackThere are many steps along the way and many different jobs for our Autistry students. We will be working closely with Suzi at SLM Creative to create the packaging and the instructions for these unique project kits. So, look for a cool catalog of Autistry products to go online in Spring 2013!

Mechanical counter made on the ShopBot Part 1

| December 23, 2012

Owen adjusting the ShopBot

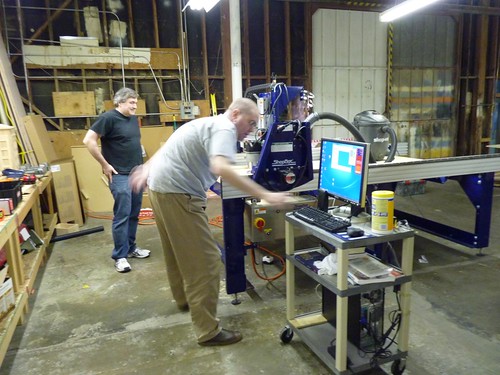
We’re loving our new ShopBot, a robotic wood cutting/carving machine. I’ve been looking for projects that highlight the machine’s capabilities.

Matthias Wandel's counter 
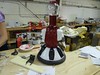
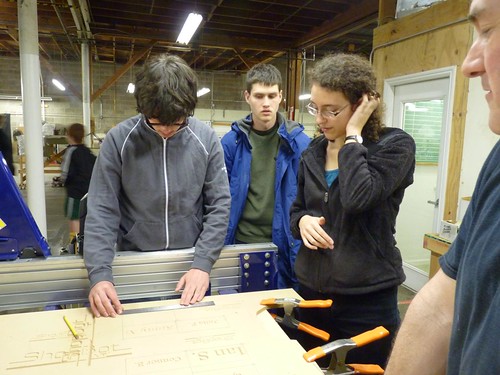
This Wooden counter was designed and made by Matthias Wandel.

Fascinating and exactly what I was looking for. Matthias has examined traditional mechanical counters and explains their workings while designing one in wood. His full write-up shows examples of each aspect of the mechanism.

Matthias makes all his wood gears using a bandsaw. However, he designs his gears using a program he wrote and comments on the ShopBot forums confirmed that the output of this software works in the PartWorks program.

Confused yet? So was I. It was time to start working this process methodically.

First I bought Matthias’s plans. At $12 I feel these are an excellent value and I strongly recommend that others purchase these plans if you are interested in this project.

I found one page that had two gears I thought would make a good start on the learning curve.

First gears

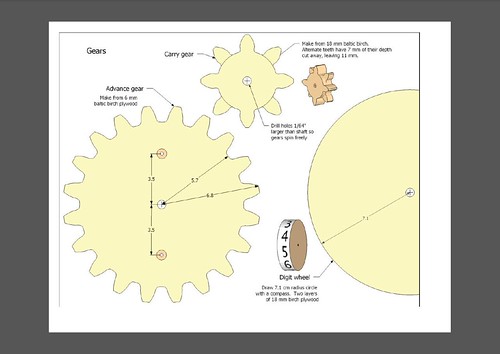
First I wanted to make the 20-tooth large gear and the 8-tooth smaller gear. I bought Matthias’s Gear Template Generator program for $26. After a bit of experimenting with the various parameters I had a set of gears that were the same size and shape as the those in the counter plans.

Gear template generator

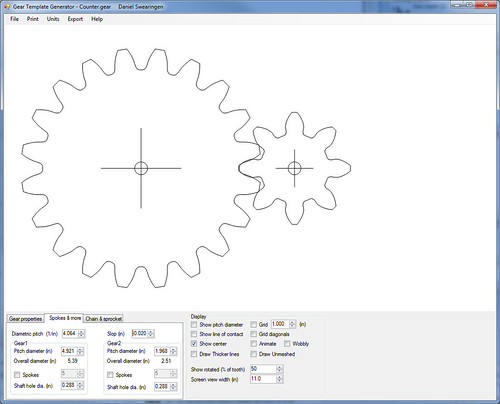
Next I exported these gears in DXF format which can be imported into PartWorks.

PartWorks is a program supplied with the ShopBot and it has two functions: manipulation of drawings, and conversion of drawings into cutting instructions that can be read and executed by the ShopBot.

Importing the gear drawings was seamless and some checking confirmed that a standard 1/4-inch cutting bit would be able to cut the gears with almost no loss in curve detail.

PartWorks gear imported from template generator

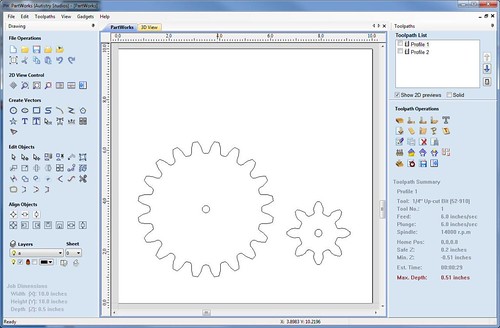
Next I generated a cutting path and used PartWorks preview cutting feature to confirm it was doing what I intended.
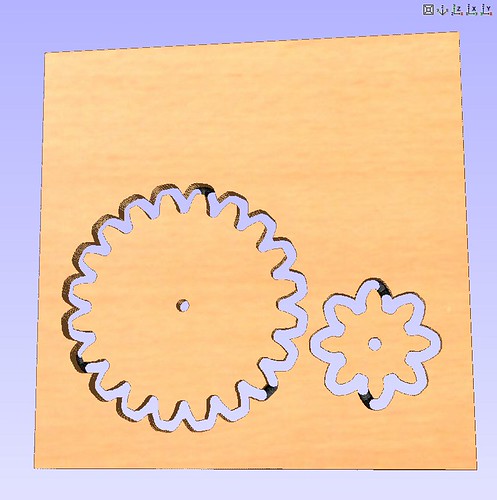
PartWorks cut preview

Time to cut!

I did one “air cut” where you have the machine move through the cut but in the air above the wood. This allows you to confirm that the movements look as you expect and stay within the range you expect.

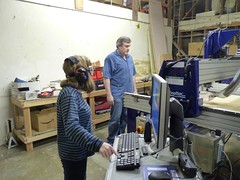
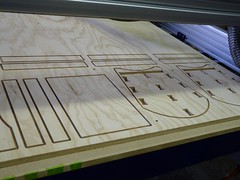
I set up some 1/2-inch birch plywood (note that I used four spring clamps, you can only see two in the pictures), calibrated the ShopBot and started the cut.

Cutting gears in plywood on the ShopBot

Oops 
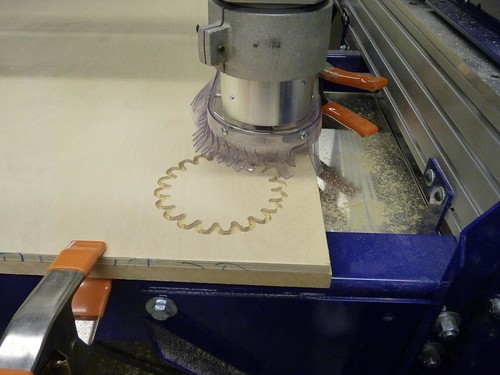
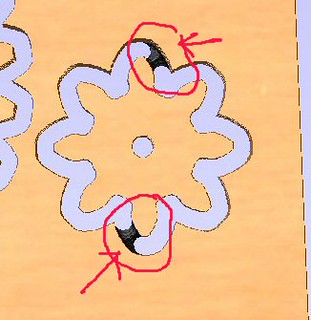
One mistake was that I only used two small remainder-tabs on the smaller gear. it needed more so when the ShopBot moved to cut the center hole the small gear broke loose and rattled on the bit making a large rough center hole.

Little errors like this are why you test!


Fresh from the ShopBot

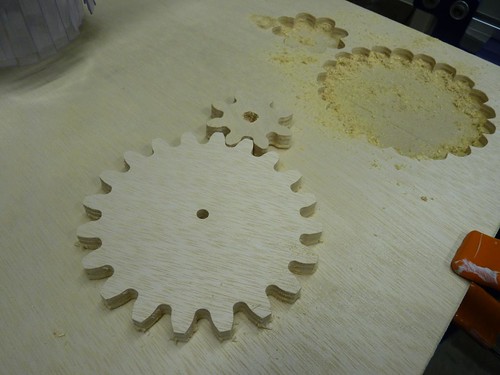
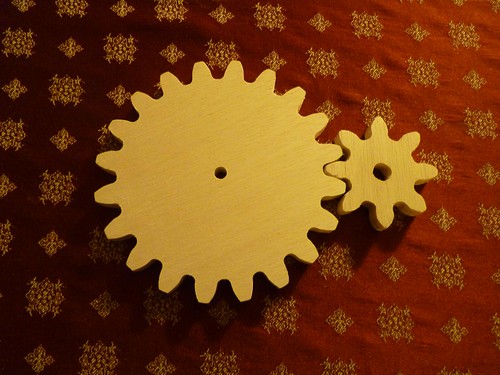
Other than the enlarged center hole, the gears look and work great. After a little sanding, I have my first two gears.

Sanded gears

Over the next few weeks I’ll convert Matthias’s counter plans into a format usable by the ShopBot and proceed to make the parts.

Ryan’s Guitar

| December 18, 2012

Ryan at work

Ryan is well on his way to finishing his second electric guitar After sanding the maple guitar body until it was as smooth as polished glass and absolutely blemish free, Ryan carefully taped off the parts of the guitar he did not want to paint. Then, using yellow Rit fabric dye mixed with water he painted the entire front. He added a stronger mixture of green dye to the edges creating a starburst pattern.


Next Ryan will seal it all under clear coats and add the neck, pickups, and strings.


This has been a true labor of love.

Ryan's green sunburst

Court Does Dollzzz

| December 18, 2012

When I was a little girl my grandmother took up doll making as a hobby after she retired. She made porcelain dolls with hand painted faces with glass eyes; hand stitched all the clothing, and bought beautiful wigs for each of her creations. Mostly she made baby dolls and gave them to her granddaughters, but she also made Native American maidens and fairytale princesses. I always wanted to make dolls with her, and tried. However, the time and skill required to make porcelain eluded me as a child, as I was impatient. Now being at adult I have rediscovered this interest in the modification of the popular line of dolls by Mattel, Monster High. This was not, however, my first choice in doll-type.

001 What I really want to work on are Dollfie ball jointed dolls from Japan. These are incredibly intricate cast resin dolls with realistic points of articulation and an eerie ethereal quality that I have admired on the internet for ages. It turns out these dolls are majorly expensive. As in more than ½ my mortgage payment expensive! So I tried to find an alternative, and discovered an entire group of people were modifying these Monster High Dolls in lieu of Japanese Ball-Joint Dolls (JBD) because they too were artists on a budget!

Monster High characters are the theoretical children of classic movie monsters like, Frankenstein, Dracula, Medusa and the like. The proportions are funky and a little creepy but very suited to creature-like humanoids. They have pre-made characters like Draculaura, and Howleen Wolf, these dolls feature pre-made back stories, make-ups, clothes and rooted hair. The line also feature “Make your own” sets with no pre-determinate features beyond plastic color and minor feature differences.

Four weeks ago I purchased my very own set of “Make your Own” dolls and got to work on a goldfish inspired sea-monster doll. First I found tutorials online and proceeded to stand on their shoulders to help me create my new dolls features. Thus far I have stripped her of her original face paint, painted her skin a new color and created a wig.

First I removed her current facial features and prepped her body with a rubdown of acetone to remove previous paint and “mold release” from the doll parts. Then I prepared with Mr. Hobby brand, Mr. Surfacer, primer. This turned out to be quite a journey to acquire, as every doll modification blog post and enthusiast insists that Mr. Hobby Products are the best materials to use in doll modification. Unfortunately, these products are from Japan, and are really difficult to get with any regularity. (Thank you Big Robot Hobby in Berkeley, and The Hobby Store in Japantown for existing!) After I primed the surface I painted with white hobby paint as a base and added layers of orange. This is where I have paused on the body and face for the time being, because the hair has been a journey.

After much research and reading of countless blogs I found a tutorial on making wigs for BJDs and Monster High dolls from, Updog1986, on YouTube . After making the wig cap, a time consuming project in itself, I made lots and lots of hair wefts from fake Kankelon hair bought from a wig shop, and foam tack glue. After the wefts dried on my “scrap wood weft making board”(I made this with a scrap board wrapped several times in cling wrap. Then I cut them into smaller workable tracks and began gluing them around the wig cap I made.

Autistry Studios – a profile of excellence

| December 9, 2012

Janet Lawson and Dan Swearingen, the founders Autistry Studios were chosen as one of ABC7’s 2012 Profiles in Excellence.

Autistry Newsletter – December 6, 2012

| December 6, 2012

This has been a great year at Autistry and we are gearing up for more growth and new ventures in 2013. Last week Autistry was featured in the ABC7 special Profiles of Excellence. The producer, Laura Kutch and photographer, Loren Morrison joined us for a Friday workshop. They had a great time, loved what they saw and returned to film the Autistry Fun and Food Faire. They did a great job of describing our program and capturing the spirit of Autistry.

In preparation for launching Autistry Enterprises all our students are getting hands-on training on the new ShopBot (robotic router). Dan has prepared lessons starting with engraving your own name, then creating the plans and cut-file for a simple box, and then designing, cutting, and producing a complex project. This is a wonderful piece of equipment and we are looking forward to launching Autistry Enterprises in 2013!

Peter, Andrew and Allie doing ShopBot training

A key component of our program is helping our students become mentors. As they master techniques and skills we encourage them to pass on their knowledge to other students. Ian G. has become an expert LARP sword maker. He designs the weapons, cuts out the patterns, makes the handles and the foam blades, and even sews the covers! Ian is now teaching other students his craft.

Ben and Ian sewing a sword cover

Thank you all for your support of Autistry. There is much more to come in 2013!
The Autistry Team.